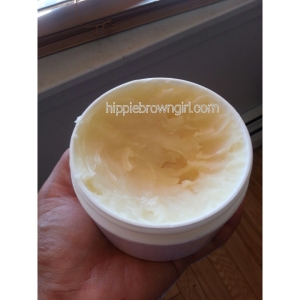
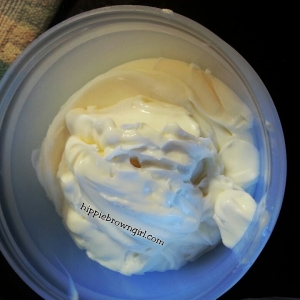
Peppermint Eucalyptus Foot Cream

foot cream

How’s the weather where you are?  Temperatures are starting to dip for us here in the Northeast and so my socks are being dug out from the bottom of my drawer.

I’m not much of a sock girl.  I just love to be barefoot, even inside of shoes.  I rarely wear sneakers (although I’ve been on the hunt for a great pair I love for years now!) and I spend as long as I possibly can in sandals – not flip flops though, I hate flip flops.  My desire to be barefoot can’t compete with the fact that my feet are always the first part of my body to feel the change in weather though.  On our first day with 40° F temperatures, I rummaged around a bit and found my favorite fuzzy socks.  One of my favorite things to do is give myself a foot scrub, slather foot cream on and then immediately put my feet into thick socks.  If you’ve never tried this, you have never felt the true awesomeness of buttery soft feet.  This ritual can only be performed during the months of November and April for me because if it’s too warm out, things can get kind of gross.  So as soon as the temperature permitted, I had to whip up a batch of this scrumptious cream!

This recipe makes 227 grams/8 ounces.

Water Phase

  • 55 grams of colloidal oatmeal tea [see this post for how make it]
  • 58 grams distilled water
  • 9 grams raw honey

Oil Phase

  • 15 grams kukui seed oil
  • 7 grams castor oil
  • 13 grams avocado oil
  • 37 grams shea butter
  • 7 grams beeswax (or other wax of your choice)
  • 15 grams emulsifying wax
  • 7 grams conditioning emulsifier/BTMS

Cool Down Phase

  • 3 grams Optiphen
  • peppermint essential oil (I like 2nd distill because it has more of a sweet candy cane scent but that’s up to you!)
  • eucalyptus essential oil

For information about how to combine these ingredients, see this post

You can add peppermint and eucalyptus oils until you have the smell and tingle you prefer.  I don’t really measure it when I’m making the cream because I smell to see if it’s ready but I don’t exceed 2 grams (that’s probably a lot!).

I promise your feet will be relaxed and silky soft!  Spend all winter pampering your feet so they can be ready to be bare in the summer.

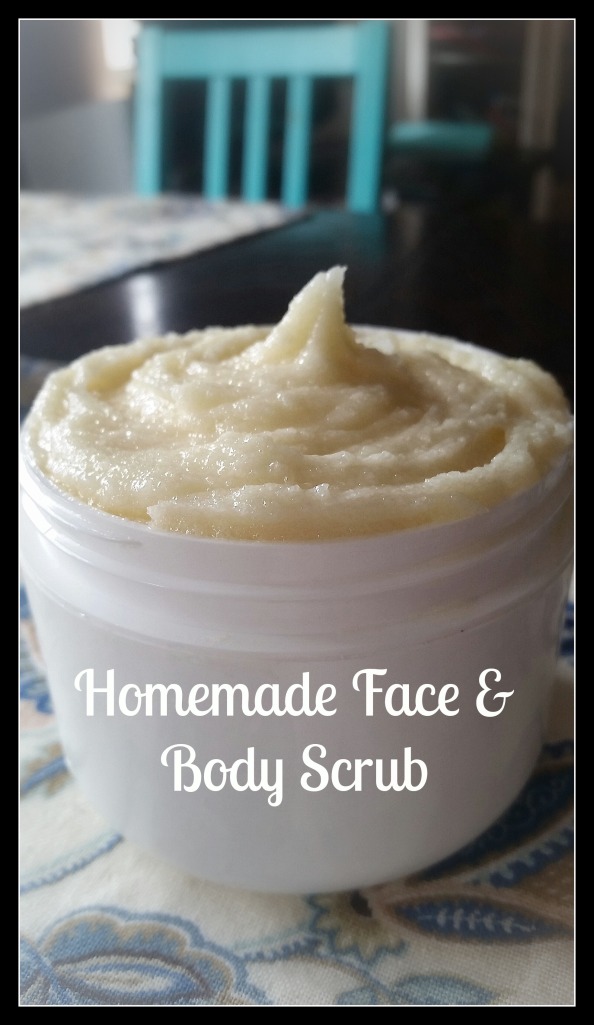
THE BEST SCRUB EVER

20140724_121137_1.jpg Yes, the title has to be in all caps.  It’s for emphasis.  I need all caps because I’m so excited that after some hundreds of trials, I have finally formulated a scrub I like. I’m, of course, picky about my skincare products.  Duh. That’s mostly why I make my own.  But I am particularly picky about scrubs.  It is so easy to create a scrub that sucks.  It’s much harder to make a crappy lotion or cream.  There are a few store-bought scrubs I like but they always have at least one of two problems: either they have unsavory ingredients or they cost too much.  As for most DIY scrubs…I have a few issues with them.

They are greasy. This is my biggest problem with most DIY scrubs.  They contain oil, salt, and sugar.  This does not a yummy scrub make!  Sure, it will exfoliate but so does a sandbox.  If you’re the kind who likes to scrub often or scrub your whole body, after a while of using this combination of ingredients, your pipes will start to suffer.

They don’t rinse clean. This is related to the fact that they are greasy.  I don’t like oily or sticky residue after scrubbing.  I want my skin to feel supple, yes, but I also want it to feel clean.  I want to moisturize as usual and be on my way.

They are sticky. Sometimes I see a recipe that doesn’t call for much oil or any at all.  Usually, in its place, glycerin is used.  Glycerin is not a bad ingredient for a scrub.  It rinses better than oil but it can leave a sticky film that lingers if you use too much.  It’s a humectant, meaning it draws moisture to the skin, so it has its benefits.

They’re too abrasive. Too much salt can make a scrub harsh.  Sugar is gentler.  Brown sugar is really gentle.  A combination of sea salt and sugar is best, more sugar than salt.

The texture is just all wrong! A good scrub should spread easily, have some slip, feel grainy but not like kitty litter or small pebbles. It should make your skin feel clean, soft, and touchable.  The texture is the most important part of a good scrub!

I like to use my scrub 2-3 times a week on my face and as needed on my body, usually right after I shave for super silky smoothness.  I cleanse, scrub, moisturize – in that order.  You’ll notice that amounts are given in volume, not in mass like I normally prefer.  My scale is broken for the 3rd time and I refuse to buy the same one again but I can’t find one I like.  If anyone has any suggestions, please share!  Volume works well enough here though.

Ingredients & Tools

  • 1 tablespoon cetyl alcohol
  • 2 tablespoons jojoba oil
  • 2 tablespoons castile soap
  • 1 tablespoon glycerin
  • 1 tablespoon witch hazel
  • 2 teaspoons vitamin E oil
  • 1/2 teaspoon Optiphen
  • 2 teaspoons silk amino acids (optional!)
  • essential oils (optional, just make sure they’re safe for use on the face)
  • 1/2 cup sugar (organic brown if you’re sensitive)
  • 1/4 sea salt (you can use black salt if you’re fancy)
  1. Combine cetyl alcohol, jojoba oil, and vitamin E oil in mixing container.  Heat until just melted, either in the microwave or in simmering water.
  2. In a separate glass or Mason jar, combine glycerin, witch hazel, silk amino acids.  Add to the mixing container.
  3. Using the immersion blender, blend briefly until it’s combined and thick – should take less than 15 seconds.  Add castile soap and essential oils (if using).  Blend for 5 seconds or so.  Transfer mixture to the bowl.  Let it cool about 10 minutes.
  4. Stir in Optiphen, salt and sugar.  Spoon into your storage container.

BEST SCRUB OF ALL TIME.  Pin it here!

You can add all kinds of stuff and make all kinds of substitutions.  The sky is the limit, let your imagination run free! Send questions my way at hippiebrowngirl@gmail.com and stay tuned for another email question session soon.

3 Ingredient Body Butter Recipe

I love a luxurious, silky body butter.  Usually, I’m big on including water in my recipes because emulsions really contribute to the decadent feeling you get from a cream.  We’re having a brutal winter here in the Northeast so we are requiring much thicker, denser moisturizers.  I tried lotion bars and they were very easy to make, worked really well on my kids but my husband and I don’t find them to be easy or convenient to apply to ourselves.  I might continue to make lotion bars for my girls but make this butter for the grownups.

This butter should be used right after a shower or bath while skin is still damp for best results, although I use it on dry skin too and it’s still great.  I also like to use it as a cuticle butter/hand cream.  As usual, the question is: Does it work on Sasha’s skin?  The answer is yes! If it passes the Sasha test, it’s a definitely keeper and it will go down in my big book of recipes.

Enough chat, here are the percentages:

  • 10% wax
  • 40% liquid oil
  • 50% solid oil/butter

This is the basic recipe. I know I said this is a 3 ingredient recipe in the title. You could easily do this with 3 ingredients. For example: beeswax, jojoba oil, shea butter would be lovely. I, of course, can’t keep things so simple because I’m crazy.  The recipe I used to make 16 ounces is below.

PhotoGrid_1393084560262 (1)

We already used some 🙂

  • 45 grams beeswax
  • 60 grams apricot kernel oil
  • 15 grams castor oil
  • 40 grams avocado oil
  • 40 grams jojoba oil
  • 27 grams sweet almond oil
  • 150 grams shea butter
  • 77 grams mango butter

I melted everything together in a double boiler, stirring constantly.  Then I poured it into my containers and put them in the freezer until they set.  I put them in the freezer to ensure that they cool as quickly as possible, reducing crystallization which cuts down on the grainy feeling that can sometimes be a problem with shea butter and mango butter recipes.  Don’t forget to take them out before they get too cold though!

Okay so that’s 8 ingredients, which is 5 more than 3.  I struggle to keep it simple with my recipes.   But you could follow the percentages above and customize the recipe however you please.

Some nice essential oils would be great to add too.  Be sure to do that once you’ve melted everything already and have removed the mixture from the heat.

PhotoGrid_1393084497745

Do you follow my Soap & Lotion board on Pinterest?  Check it out for some great easy ideas.

Homemade Eczema Cream Recipe

I mentioned in my last post that I started making my own products when I was pregnant the second time [read that post here] but I didn’t start making creams until a few months after that.  I started making creams and lotions because my older daughter, Sasha, has the driest skin I have ever seen!  Nothing from the store was working or if it did work, it stopped working soon after we started using it.  I mean, her dry patches are out of control!  And her face often looks like it’s been wind-burned.  She is SO dry.  I bathe her in colloidal oatmeal, I slather oil all over her, I rub her down with aloe vera gel straight from the plant…I’ve tried just about everything I can think of.  Very little works on her.

Finally, we have found something that does the trick.  This cream is more like an ointment and it does not have a preservative.  It must be refrigerated and it must be used within about 2-3 weeks.  I make it in small batches; this recipe makes 4 ounces.

Ingredients

  • 40 grams shea butter
  • 36 grams colloidal oatmeal tea [see how to make this here]
  • 13 grams raw honey [see how awesome this stuff is here]
  • 5 grams beeswax
  • 20 grams sweet almond oil
  • 8 grams emulsifying wax [optional, it goes a long way toward helping the cream blend well but some people don’t like it]
  • 15 drops rosemary essential oil [optional]

Directions

  1. Melt the shea butter, beeswax, sweet almond oil, and emulsifying wax together.  You can use a double boiler or microwave in a glass container in 30 second increments until it’s just melted.
  2. Gently heat the colloidal oatmeal and raw honey, either in the double boiler or microwave for 30 seconds.  You want it to be warm but not too hot to handle.
  3. If you’re using emulsifying wax, simply put the ingredients into a bowl and blend with a stick blender until blended.
  4. If you’re not using emulsifying wax, you will have to gradually stream the oil mixture into the oatmeal/honey mixture while you blend with the stick blender.  Blend until it emulsifies/blends.  It’s possible that it will never truly blend and you may have to mix before each use.  I recommend using the emulsifying wax, especially because it’s used at such a low percentage.
  5. Add the rosemary oil, if using, and stir in.  Pour into containers and REFRIGERATE!

PhotoGrid_1388166109411

I use this on Sasha along with a homemade cream wash that will be on sale at my Etsy shop soon.  The cream wash is a great alternative to soap because soap is so drying!  Winter is killer on our skin so we try hard to retain moisture.  Give it a try and let me know how it goes!

Check out my Soap & Lotion board on Pinterest for easy ideas

How to make colloidal oatmeal

Colloidal oatmeal is great stuff.  It’s good for itching, eczema, and almost all dry skin problems.  It’s in lots of commercial lotions, like Aveeno [fun fact: the botanical name for oats is Avena sativa so it seems that’s where they got that name].   I’ve mentioned many times that my eldest daughter has eczema, although it has become quite mild.  She does still have somewhat sensitive skin, though, and her skin is naturally extremely dry. Lotions and creams that work on the rest of the family often don’t work on her.  I wanted to make some colloidal oatmeal to use in my formulations because of her dry skin but also because my husband has been having some trouble with itchy (although not dry) skin.

Colloidal oatmeal is easy to make if you’re not making a whole bunch of it. I usually make just enough for whatever recipe I’m about to put together since it only keeps for about a week in the fridge.  All you need is steel-cut oats (because they are usually the least processed), distilled water, a coffee/spice grinder, and cheesecloth.  And of course, a stove and a container.

  • 1-2 tablespoons of steel-cut oats
  • 1 cup boiling distilled water
  1. Put your oats into a coffee grinder. Grind until you have a fine powder.  Place it in heat resistant container (I use a Pyrex measuring cup).  Add the boiling water.  Whisk until combined.
  2. Once combined, let it sit for 5-10 minutes then whisk again.
  3. Strain the mixture through cheesecloth into your storage container (I use a Mason jar. Big surprise there, i know) Use right away or store in the refrigerator for up to a week.

IMG_20131007_062040

Top left: oat flour made in coffee grinder
Bottom left: oat flour steeped in hot water
Top right: cheesecloth setup
Bottom right: after the mixture has been strained

In lotions and creams, this would be part of the water phase.  Also the paste that you get in the cheesecloth is an awesome itch salve. Apply it to itchy areas and let sit then wipe off with cool cloth or mix it in with a balm and apply before showering.  Safe for use on poison ivy, bug bites, rashes, whatever itches!

Try this recipe for eczema using colloidal oatmeal

Check out my Soap & Lotion board on Pinterest for easy ideas

Homemade Fix+

Here’s how the MAC cosmetics website describes Fix+: “An aqua-spritz of vitamin and minerals, infused with a calm-the-skin blend of green tea, chamomile, cucumber, topped off with the fresh, natural, energizing scent of Sugi.  Adds radiance, finishes makeup. Spray it on.  Skin drinks it up!”  It costs $21.00 for 3.4 fluid ounces [Side note: I used to work for MAC and I’m pretty sure the price has increased substantially since I stopped working there.  I was shocked at this price.]  Truthfully, I love this product.  It was probably the last remaining non-natural element of my skin routine until recently when I finally came up with a recipe.

PhotoGrid_1380986601190

This is the ingredient list for MAC’s Fix+: Water, glycerin, butylene glycol, cucumber fruit extract, chamomilla, camellia leaf extract, tocophryl acetate, caffeine, panthenol, hydrogenated castor oil, fragrance.

Not too bad, actually.  I’m not completely offended and repulsed.  So that’s good.  But my all-natural alternative is pretty awesome for only a fraction of the price and smells great.  And there’s no butylene glycol

This recipe is enough to fill an old Fix+ bottle, so it makes about 3 fluid ounces.   I love the way that bottle spritzes.  I can’t find a bottle that compares.  You can use any bottle that spritzes.  You don’t want it to spray though because you want an even mist all over your face.  Be sure to spritz from at least half an arm’s length.

Ingredients [these were all things I already had because I make products already.  But if you don’t or you’re just starting, these ingredients come in handy for lots of other products I make.]

  • distilled water
  • 1 green tea bag
  • vegetable glycerin
  • cucumber hydrosol [optional, some people don’t like the smell]
  • chamomile hydrosol
  • vitamin E oil
  • rosewater
  1. Brew the green tea with 1/4 cup of hot distilled water and one tea bag.  Let it steep for at least 10 minutes and allow it to cool.  You only need about a tablespoon for this recipe but I use this concentrated green tea for other things and it can be stored in the refrigerator for your next Fix+ batch too.
  2. In your bottle, add about 1 teaspoon of vegetable glycerine, 1-2 tablespoon of cooled green tea, 1 teaspoon of cucumber hydrosol if you’re including it, 1 tablespoon of chamomile hydrosol, 10 drops of vitamin E oil, 2 tablespoons of rosewater.  Then fill almost to the top with distilled water.  Shake it up to mix.  Apply after moisturizer and/or after makeup.

Enjoy!

Winter Citrus Body Cream Recipe

I know I’m not the only person whose skin gets crazy dry once the weather starts to change.  My daughters’ skin starts to get very dry too, especially my eldest who has mild eczema.  Of course, I had to order some shea butter, which is the best butter for dry skin, in my opinion.  I was also going to order some fractionated coconut oil but changed my mind because I wanted to try something new.  I ordered kukui nut oil instead.  Here’s a quick rundown on this exotic, but pretty cheap, oil:

  • a light oil, not dense, clear to light yellow in color
  • penetrates the skin well, so great to pair with a dense butter or oil that does not penetrate well (like cocoa butter, coconut oil, castor oil)
  • leaves minimal oily feeling on the skin
  • been used in Hawaii for many years, mostly as a massage oil. The kukui nut tree is Hawaii’s state tree.
  • should not be exposed to high heat

If you recall from a post I did about picking the right oils for your lotion (click here to read it!), shea butter has medium skin penetration but a heavy oily feeling.  Since shea butter is my go-to winter fat, I wanted to combine it with something with similar penetration and oily feeling to jojoba oil but without the high price.  So I decided to give kukui nut oil a shot.  I’m glad I did! It’s good stuff.  Of course, you can find it at Mountain Rose Herbs.

Look at this yummy cream

PhotoGrid_1380406329289

It’s so luscious! And moisturizing! And I love the light citrus scent.  It might be the best cream or lotion I’ve ever made.  [If you’re not sure about what the differences between cream and lotion are, click here.]  It will be perfect for fall and if necessary, I can make a few adjustments if our winter is especially cold and dry.  Enough chat, here’s the recipe.

Water Phase

  • 150 grams distilled water
  • 100 grams aloe vera liquid (not juice or gel) or your favorite hydrosol
  • 20 grams raw honey (acts as a humectant which draws moisture to the skin)

OR

  • 250 grams distilled water
  • 20 grams raw honey

Oil Phase

  • 50 grams kukui nut oil
  • 22 grams castor oil
  • 8 grams vitamin E oil
  • 100 grams shea butter
  • 50 grams emulsifying wax

Cool Down Phase

  • 5 grams Optiphen
  • 40-60 drops rosehip seed oil
  • 50-80 drops grapefruit essential oil (for fragrance)

To put this lovely cream together,

  1. You need at least 2 weighing containers, Mason jars are my favorite.  In one container, weigh your water phase ingredients, make a note of the final weight, and heat the container in the microwave for a minute.  The liquid should be very warm, but not too hot to handle.  When it comes out of the microwave, weigh it again.  If some of the water was lost to evaporation, add distilled water very carefully until it’s the same weight as it was before it was microwaved.
  2. In the other container, put all your oil phase ingredients except the kukui nut oil.  Microwave in 30 second increments until the shea butter is just melted.  DO NOT OVERHEAT. If any smoke forms, you will have to discard and start over.  Once it’s all melted, add the kukui nut oil.
  3. In your mixing container, add the oil phase from your weighing container.  Pour the water phase ingredients into the oil weighing container.  Then pour the water phase into the mixing container.  This prevents you from wasting any of your oil phase.
  4. With a long, metal spoon, stir for about 30 seconds.  Using your stick blender, blend for 15-20 seconds.  Keep the blender immersed so bubbles don’t form.  Add the cool down phase and blend for 5 seconds.
  5. Pour into your storage containers.  I use old Talenti gelato and sorbet containers, thoroughly washed and sanitized with alcohol.

PhotoGrid_1380451854186

I needed 2 containers for this recipe but I don’t fill them to the top.  If you make this, please don’t be alarmed by the initial consistency, which is very much a liquid.  As it cools, it thickens up very nicely and becomes very creamy and light.

Happy lotion making!

Simple Summer Lotion Recipe + How to Pick the Right Oils & Butters

If you’re new to making lotion or want more information, please start with the basics here

I don’t know about you guys but I like to switch my lotion when the weather gets warm and humid.  In the winter, when the heat in our place is on, everyone’s skin gets drier and so I opt more for creams (less water than a lotion) when writing recipes. I also include heavier oils that don’t penetrate the skin well but protect well.  But when the first 80 or 90 degree day hits, I don’t want cream anywhere near me.  I prefer lighter lotions, with higher water content and lighter oils that penetrate the skin, in the summer.

Before I get into this recipe, let’s talk about the properties of fats a.k.a. oils and butters.

My friends ask how I know how to write lotion recipes.  Honestly, it’s a combination of things: my chemistry background, research, trial and error, love of experimenting.  I have never written a recipe that “failed” but I have written recipes that just didn’t turn out how I wanted them.  Most of the time, if a lotion came out differently than I expected, it was because I was using fats that were not good for what I wanted.  So I did some research — I stay researchin’ — and found some information that I’m going to share with you.

Fats are what you put into your lotion to seal in moisture.  Your skin has sebaceous glands that produce oils naturally.  These oils help protect and keep your skin elastic.  Natural oils are often stripped when you take a shower or do dishes or spend too much time in water. [Side note: I do not, I repeat DO NOT, believe in oil-free moisturizers.  There is no such thing as an oil-free moisturizer.  I don’t care how oily your skin is, if you’ve gone oil-free, you’re going in the wrong direction, but that’s for another post.]

Some oils penetrate the skin well, similar to the sebum (oil) your skin produces.  Other oils do not penetrate well; they sit on the outermost layer of skin, or penetrate only minimally, and form a barrier, which is good.  A lotion that combines fats that penetrate well with fats that don’t is best.  In the winter, I use a higher proportion of fats that form a barrier and less that penetrate.  In the summer, it’s vice versa.  I do not desire a greasy lotion ever, though, so finding balance is key.

Here are some stats on some common oils and butters that I like to use in my lotions:

  • shea butter: medium penetration, heavy oily feeling
  • sweet almond oil: medium penetration, light oily feeling
  • apricot kernel oil: medium penetration, heavy oily feeling
  • avocado oil: low penetration, heavy oily feeling
  • cocoa butter: low penetration, heavy oily feeling
  • coconut oillow penetration, heavy oily feeling
  • fractionated coconut oil: high penetration, almost no oily feeling
  • jojoba oil: high penetration, almost no oily feeling
  • mango butter: medium penetration, light oily feeling

I use other oils and butters too but more occasionally.  These are my go-to fats.  They’re fairly inexpensive and common.  So I wouldn’t make a lotion with coconut oil and shea butter only because it would be quite oily and wouldn’t penetrate enough.  But a lotion with shea butter and jojoba oil would probably be fine since the jojoba would penetrate and the shea butter would sit on the epidermis (top layer of skin) and lock the moisture in.  Get it?  Good!  Email me at hippiebrowngirl@gmail.com with questions

Now for the recipe (finally!)

Simple Summer Lotion (makes 16 ounces)

Oil Phase

  • 45 grams fractionated coconut oil
  • 18 grams coconut oil
  • 5 grams jojoba oil
  • 14 grams cocoa butter
  • 15 grams vitamin E oil
  • 14 grams emulsifying wax
  • 14 g conditioning emulsifier

Water Phase

  • 160 grams distilled water
  • 100 grams aloe vera liquid (not to be confused with aloe vera juice or gel)
  • 58 grams rosewater

Cool Down Phase

  • 5 grams Optiphen
  • 20 drops lavender essential oil
  • 30 drops rosehip seed oil
  • 20 drops ylang ylang essential oil

I like to store in two 8-ounce bottles.  I don’t normally use pump tops.

20130701_121121

This is about a month’s worth of lotion for 2 adults and 2 small children.  It took about 20 minutes to make, another few hours to cool and thicken.

Thanks for reading!