The Ultimate Starter Guide for DIY Skincare

So you want to start making your own skincare products but you don’t know where to start or what to buy?  I’m here for you!  In this post, I will discuss some essentials for your kit and some items that are nice but optional.  By the end, you should have a basic shopping list started.  The item links take you to my favorite products (free advertising so you know I must really like them).

This post has been a long time coming and it’s been a hot request in my email inbox (which is hippiebrowngirl@gmail.com).  Let’s get started!

Basic Equipment

I refer to basic equipment in my intro to lotion making post but let’s reiterate here.  You NEED:

  • a stick blender Listen.  Don’t get the cheap $10 one.  You will be sorry.  Trust me, I know from experience.  Get a decent one, doesn’t have to be the most expensive option. I’ve been using this one for about 3 years now on a regular basis and it’s still in perfect working order.  My favorite feature is that the stick is detachable so I can clean it easily and quickly without fear of electrocution.
  • weighing and mixing containers  I suggest mason jars because they’re cheap and easy to find but it doesn’t really matter as long as they’re heat-resistant (microwave-safe, can be placed into simmering water) and easy to clean.  I go for glass over plastic because plastic holds smells and also because I don’t like plastic.  Seriously – I don’t even own plastic tupperware, only Pyrex dishes.
  • scale This isn’t a link to a specific scale.  Get whichever one you’d like.  I don’t have a preference although consider the batteries needed because they can be a pain to replace

Those are the pieces of equipment you absolutely need.  The following items are nice to have but optional.

  • glass mixing bowl Pyrex is good.  You want to get a size that could fit comfortably on top of a pot so you can fashion a double boiler.  This is also good for mixing if you like to make body butters that don’t require an emulsion (because they don’t contain water).
  • disposable pipettes  These come in handy when you put just a little too much of an ingredient into a container.  They allow you to remove a gram or two at a time so you don’t exasperate yourself unnecessarily.
  • glass pitcher I don’t have a preference for this either but make sure it has a handle.  This is my favorite container for mixing because your stick blender stays immersed easily making for a smoother emulsion and little to no air bubbles.  It’s easy to pour your lotion once mixed and it’s nice and tall so your stick blender will have no problems fitting.
  • large metal spoon Stainless steel is best.  This is good tool to have when your emulsion is acting weird or you’re getting bubbles.  It’s also essential if you’re going to start making soap.
  • silicone spatula To get allllll the lotion out
  • electric mixer This is nice to have if you make body butters or if you like to whip your creams after emulsifying.  That can be really luscious and velvety, especially for a foot or hand cream.

So that’s the hardware.  How about the ingredients?  Well, here is where it gets fun!  But what’s fun for me might not be fun for you so feel free to substitute as you see fit.

Basic Ingredients

You NEED:

  • distilled water – I didn’t link to this because I get it at the grocery store.  It’s cheap.  No, tap water will not do.  No, boiled tap water will not do.  No, filtered tap water will not do.  DISTILLED WATER.
  • antioxidant I use vitamin E oil
  • emulsifier  I recommend emulsifying wax NF because it’s virtually foolproof.   (You can order it here too, same place as previous link, for the same price.)
  • preservative Maybe it’s controversial to say you NEED this but once you really start making lotion, you’ll need a preservative.
  • butters – I didn’t link to this because the choices are vast.  I personally always have shea and mango butters on hand.  Sometimes I have cocoa butter around, sometimes I have other, more exotic butters.
  • oils – Again, I didn’t link here because there are so many.  I just about always have the following oils: jojoba, avocado, camellia, castor, fractionated coconut, apricot kernel, sweet almond.  But I also have others and I try new oils often.  It’s really fun to try new oils. [Check out my post on picking oils & butters here]

So that’s what you must have.  Now for the hard part.  What’s nice to have but optional?  I could write about 2,292 items on this list but I will restrain myself.  I will give you the basic optional list.  This is a starter guide.  As you start to play, you will find your own way.  Hey, that rhymes.

  • humectant – Sorry, no link here either.  I use raw honey or glycerin depending on what I’m making and I purchase both of those items from the grocery store.
  • essential oils – There are seriously hundreds of options.  The trick with essential oils is to do your (credible) research before you use them.  The essential oils I always have (or try to always have) are: lavender, peppermint, spearmint, clove, geranium, ylang ylang, patchouli, rosemary.  But there are so many, many other lovely options.  Essential oils can be expensive, though, so don’t blow your whole budget on them and use them sparingly.  They’re potent!
  • conditioning emulsifier You can emulsify without this but it’s silky and smooth and I like it sometimes.  I use it with emulsifying wax, not instead of it.
  • thickener – I put this here because I know a lot of people like thickeners.  I almost never use thickeners in skincare but I do occasionally use them in hair products, like conditioners.  Stearic acid and cetyl alcohol are good ones.
  • hydrosols Like essential oils, there are so many choices!  I particularly love chamomile, calendula, cucumber for their wonderful healing properties.  The citrus ones smell great.  A little goes a long way here, don’t overdo it.
  • aloe vera LIQUID Not gel.  Use aloe vera liquid instead of or along with water for additional soothing and healing.
  • beeswax – For when you need a heavier cream – think foot cream, heavy-duty hand cream.

Could you also get some silk amino acids?  And maybe some panthenol?  Possibly some fragrance oils?  Of course, but when would I ever end this list?  There are so many possibilities.  That is the beauty of making your own products; it’s a wonderful combination of science and creativity.  That’s why I love it!

What would you add to this list?  Please drop suggestions in the comments.

THE BEST SCRUB EVER

20140724_121137_1.jpg Yes, the title has to be in all caps.  It’s for emphasis.  I need all caps because I’m so excited that after some hundreds of trials, I have finally formulated a scrub I like. I’m, of course, picky about my skincare products.  Duh. That’s mostly why I make my own.  But I am particularly picky about scrubs.  It is so easy to create a scrub that sucks.  It’s much harder to make a crappy lotion or cream.  There are a few store-bought scrubs I like but they always have at least one of two problems: either they have unsavory ingredients or they cost too much.  As for most DIY scrubs…I have a few issues with them.

They are greasy. This is my biggest problem with most DIY scrubs.  They contain oil, salt, and sugar.  This does not a yummy scrub make!  Sure, it will exfoliate but so does a sandbox.  If you’re the kind who likes to scrub often or scrub your whole body, after a while of using this combination of ingredients, your pipes will start to suffer.

They don’t rinse clean. This is related to the fact that they are greasy.  I don’t like oily or sticky residue after scrubbing.  I want my skin to feel supple, yes, but I also want it to feel clean.  I want to moisturize as usual and be on my way.

They are sticky. Sometimes I see a recipe that doesn’t call for much oil or any at all.  Usually, in its place, glycerin is used.  Glycerin is not a bad ingredient for a scrub.  It rinses better than oil but it can leave a sticky film that lingers if you use too much.  It’s a humectant, meaning it draws moisture to the skin, so it has its benefits.

They’re too abrasive. Too much salt can make a scrub harsh.  Sugar is gentler.  Brown sugar is really gentle.  A combination of sea salt and sugar is best, more sugar than salt.

The texture is just all wrong! A good scrub should spread easily, have some slip, feel grainy but not like kitty litter or small pebbles. It should make your skin feel clean, soft, and touchable.  The texture is the most important part of a good scrub!

I like to use my scrub 2-3 times a week on my face and as needed on my body, usually right after I shave for super silky smoothness.  I cleanse, scrub, moisturize – in that order.  You’ll notice that amounts are given in volume, not in mass like I normally prefer.  My scale is broken for the 3rd time and I refuse to buy the same one again but I can’t find one I like.  If anyone has any suggestions, please share!  Volume works well enough here though.

Ingredients & Tools

  • 1 tablespoon cetyl alcohol
  • 2 tablespoons jojoba oil
  • 2 tablespoons castile soap
  • 1 tablespoon glycerin
  • 1 tablespoon witch hazel
  • 2 teaspoons vitamin E oil
  • 1/2 teaspoon Optiphen
  • 2 teaspoons silk amino acids (optional!)
  • essential oils (optional, just make sure they’re safe for use on the face)
  • 1/2 cup sugar (organic brown if you’re sensitive)
  • 1/4 sea salt (you can use black salt if you’re fancy)
  1. Combine cetyl alcohol, jojoba oil, and vitamin E oil in mixing container.  Heat until just melted, either in the microwave or in simmering water.
  2. In a separate glass or Mason jar, combine glycerin, witch hazel, silk amino acids.  Add to the mixing container.
  3. Using the immersion blender, blend briefly until it’s combined and thick – should take less than 15 seconds.  Add castile soap and essential oils (if using).  Blend for 5 seconds or so.  Transfer mixture to the bowl.  Let it cool about 10 minutes.
  4. Stir in Optiphen, salt and sugar.  Spoon into your storage container.

BEST SCRUB OF ALL TIME.  Pin it here!

You can add all kinds of stuff and make all kinds of substitutions.  The sky is the limit, let your imagination run free! Send questions my way at hippiebrowngirl@gmail.com and stay tuned for another email question session soon.

Email Question: Facial Moisturizers

I’m so excited about summer’s approach. Not because I like the hot weather because I really don’t.  Over 75 degrees F is too hot for me.  I like summer because my skin and hair LOVE humidity.  I know most people find humidity to be hair enemy #1 but as long as my hair is in its naturally curly state, my hair thrives on the damp air.  But summer mugginess is even better for my skin.  I doubt I will see a pimple for months and I will achieve the dewy finish I’m always after.  I’m so excited.

Additionally, now is the time I like to increase humectants, such as glycerin or raw honey, in my recipes.  Humectants draw moisture to the skin and hair but only if there is moisture in the air.  If there is little moisture in the air, humectants will actually make skin and hair drier.  So I don’t recommend humectants for those of you in a dry climate.  I usually keep them at a minimum in the winter but start upping the amount late spring/early summer when we start getting more rain and wetness here in NYC.

Onto the email question of the day!

Hi Hippie Girl!  I have been reading your blogs and read the one on making lotions and was wondering if that recipe was for body lotion or face lotion?  I am looking for a facial moisturizer recipe for mature skin- do you have one?  Thanks for taking the time to read this email! 

I love this question!  Mature skin certainly needs extra moisture.  As I age, I really do notice how important moisturizing is.  However, I do not make facial moisturizers.  That is one thing you are very unlikely to see a recipe for from me.  The reason I won’t post one is simple: it’s too risky.  Water-based facial moisturizers have too much potential to cause problems with the eyes.  Eyes are obviously really important because we see with them but they are also pretty vulnerable to infection.  Even though all recipes I post will result in a sanitary product (so long as you work under sanitary conditions) they are not sterile so I don’t plan on making a product that is water-based to be used near the eyes.  The chances of someone’s eyes actually becoming infected from a moisturizer are not that high but it’s not really a risk I am willing to take even with a preservative.  Instead, I recommend using an oil blend on the face, especially for older skin.  Since it’s not water-based, microbes are much less likely to grow to dangerous numbers.  I discuss an oil blend that I make and like here.

Hope this helps!  Please direct questions to hippiebrowngirl@gmail.com I always answer even if I don’t post it here.

Skincare Chemistry: All You Need to Know about pH

This post is by reader request.  One of my favorite chemistry topics!  Let’s jump right in.  I won’t bore you with all the details, just some basic chemistry.

pH is simple.  It’s a way of measuring how acidic or alkaline (also known as basic) a substance is.  This is done by measuring how much H+, hydrogen ion, is present in a solution.

When levels of H+ are low, you have a basic or alkaline substance.  When levels of H+ are high, you have an acidic substance.  Pure water is neither acidic nor alkaline; it’s neutral. A pH of 7 is neutral and it’s the midpoint of the scale.  As you get farther from the midpoint, the substance becomes more acidic as the numbers go down and more alkaline (basic) as the numbers go up.

Because of the logarithmic nature of this scale, each change in pH is equivalent to a tenfold change in H+ concentration.  That means that a substance with a pH of 2 is 10 times more acidic than something with a pH of 3, 100 times more acidic than a pH of 4, 1,000 times more acidic than a substance with a pH of 5, and so on.  By the time you reach a pH of 14, the H+ concentration is VERY low, making it extremely basic instead of acidic.  At a pH of 1, the H+ concentration is exceedingly high and so you have something extremely acidic.

That’s all you really need to know for this post.  Here’s a graphic for all my visual learners 🙂

ph scale 1

So what does this have to do with skincare, right?

“pH balanced”

It’s true that the skin (and hair too) is naturally acidic, usually with a pH between 4 and 6.  The outer layer where the pH of skin is fairly low is often called the “acid mantle.”  When this layer of the skin stays within its proper acidic pH range, it prevents dryness and weaknesses in the skin where bacteria can enter and cause pimples and stuff.  Of course, you should not use products that are highly acidic on your skin since a very low pH is corrosive and can burn the skin.  At the same time, using extremely alkaline products would be dangerous too due to their caustic nature and ability to dissolve skin (doesn’t sound pleasant, does it?).

Most soaps and products that clean are quite basic.  Using an alkaline product would raise the pH of the outer layer of your skin, likely disrupting the acid mantle.  Most people’s skin can bounce back from this relatively quickly.  In some instances, such as very sensitive or acne-prone skin, the skin might need some help. When I was pregnant and my skin was especially oily and sensitive, I was very aware of pH.  I tried to use as few alkaline products as I could, keeping most of my products neutral or acidic.

If you find that your skin is sensitive to pH, here’s what I recommend (of course, I am not a dermatologist!):

  • Use a cleanser that has a pH of about 8.  You can also consider using a cleanser that is closer to neutral.
  • Use an acidic toner after cleansing to help restore the acid mantle as quickly as possible.
  • Use a neutral or slightly acidic moisturizer.

If your skin is already irritated and dry from problems with pH, avoid all acidic products until you’ve healed up.  Only use very slightly alkaline and neutral products since acid will almost certainly sting and cause more damage and dryness.

In the end, the term “pH balanced” is just a marketing ploy to get you to buy stuff.  Cosmetic companies just assume that you don’t know what it means and that you’ll just buy what they’re selling because it’s “pH balanced.” Now that you know what it is, though, you can make your own stuff that meets your needs.

How to determine pH

The only way to know the pH of something is to test it out with an indicator.  Indicators are substances that change color depending on the pH of its environment.  There are many indicators but the most convenient one is pH paper.  Find a bunch on Amazon here.  You dip pH paper, or hydrion paper, into what you want to test and match up the color to find the corresponding approximate pH range.  They’re okay as far as accuracy goes, good enough for what we need.  Beware though — don’t use litmus paper.  Litmus paper only tells you if something is an acid or a base but it does not give a precise pH value.

If you’re very serious about pH and want very accurate and precise measurements, think about purchasing  a pH meter.  Good ones aren’t cheap.

Reasons to determine pH

When I make soap, pH papers are invaluable because using a soap before it’s ready can cause serious skin irritation, itching, and even burns.  Usually, I’ll put a few drops of water onto the soap, make sure a small amount of soap dissolves, then dip the paper into the very small puddle of water on the bar of soap.  When the pH is between 8 and 10, it’s a usable soap.

Some preservatives are rendered ineffective by pH.  The preservative I usually use, Optiphen, is effective between pH 4 and pH 8.  Lotions and creams I make never go beyond this range so I’m safe.  Check the manufacturer of your favorite preservative to see what the effective pH range is.  Be aware that using preservatives outside the recommended pH range can make them less effective or not work at all.

Ways to lower pH

Most of the time, DIYers want to lower the pH of their products to make them more in line with the pH of the acid mantle.  When adding any of the suggestions listed below, be sure to dilute and add small amounts at a time.  It’s better to add too little and just add more if necessary.  Add a little, test it out.

  • add citric acid — citric acid is commonly used for the sole purpose of lowering pH, not my favorite choice but has some preservative qualities which is nice
  • add vitamin C — vitamin C has some great benefits for skin plus it’s pretty cheap so I prefer using this to lower pH of cleansers and toners
  • add AHA, alpha hydroxy acid — also has good benefits for skin, as I’m sure you’ve seen before.  This is a good choice for older skin and for people who do not spend much time in the sun.  This is also the better choice for creams and lotions, in my opinion.

If you need to raise the pH of your product, sodium hydroxide is usually the choice.  Sometimes you will see sodium hydroxide on an ingredient list.  This is off-putting because sodium hydroxide is lye, with an extremely high pH, and is often used as drain cleaner.  However, it’s usually present just to raise pH.

Final thoughts on pH

pH is important but it’s even more important if your skin is sensitive or prone to breakouts.  I don’t monitor pH very closely because most of my products are close to neutral.  The cleanser I make and use religiously is right around 8, the scrub I prefer is between 4 and 5, and my moisturizer/oil blend is basically neutral.  My skin bounces back quickly from small changes to the acid mantle but if I switch to soap, with a pH of 9 or 10, my skin will inevitably break out.  If you find yourself breaking out a lot or having a lot of redness and irritation, consider lowering the pH of the products you use.

I plan on incorporating an acidic toner into my regimen so keep your eyes open for that recipe coming soon.

This post is pinned to my Homemade Skincare board.  Check it out.  There’s some good stuff pinned there and I’ll be pinning more.

Questions?  Comments?  Email hippiebrowngirl@gmail.com.  I always answer and sometimes I post Q&A here on the blog.

Homemade Shampoo & Conditioner for Natural Hair

shampoo and conditoner.jpg

I’m growing my hair out a little.  I want a bit of a ‘fro.  I don’t post too much about my hair here but I post occasional photos on Instagram.  Since I cut my hair, I haven’t been too concerned about the products I use.  As long as it looked how I wanted and wasn’t breaking, I was fine with it.  But now that I want to grow it a little, I’m more conscious of its health.  I find that I get the best growth and length retention when I use products that are mostly natural/homemade.

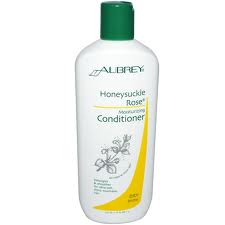
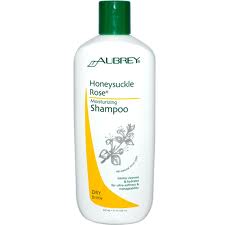
I absolutely love Aubrey Organics shampoo and conditioner.

imgres-1 imgres

But total cost for these 2 items is over $22.  Sometimes I splurge.  Most of the time, I just make shampoo and conditioner.  It costs me $2.50 to make 8 ounces of conditioner and $1.18 to make 8 ounces of shampoo.  And I would say my homemade stuff is pretty good.  I buy the majority of my supplies from Brambleberry.  I also buy a few things here and there from Mountain Rose Herbs.  The more you buy, the cheaper it is.

My only notes on these recipes are:

  1. The shampoo is not foamy and sudsy.  I know that’s a good thing because it means that it’s not sucking all the moisture out of my hair.  But still, there’s something so satisfying about thick lather.  Truthfully, I try to only wash my scalp.  Despite the lack of lather, my scalp is always squeaky clean after using this.
  2. My favorite thing about the shampoo is that it doesn’t dry my hair out and if I’m in a rush, I can use it with no conditioner and my hair still feels soft and supple.  
  3. My favorite thing about the conditioner is that it’s the only homemade conditioner I’ve ever seen that even remotely reminds me of something bought from the store.  I am not a fan of using food in my hair.  I’m not putting mushed up bananas or avocados on my head when there are starving children in the world.  *shrugs*

Okay, I’ve talked enough.  Here are the recipes.

Conditioner (makes 8 ounces)

  • 13 grams conditioning emulsifier (a.k.a. BTMS, see the note on this ingredient below)
  • 45 grams shea butter
  • 75 grams coconut oil
  • 15 grams mango butter
  • 77 grams distilled water or aloe vera juice
  • 3 grams Optiphen (you can skip this if you use it within a month and keep it in the fridge)
  • 30 drops ylang ylang essential oil
  • 15 drops rosemary essential oil
  • 30 drops rosehip seed oil
  • 25 drops lavender essential oil
  1. Melt the conditioning emulsifier, shea butter, coconut oil, mango butter all together.  You can use a double boiler or use a microwave safe bowl and microwave for 30-second increments until JUST melted.
  2. Heat up the water or aloe for about 30 seconds in the microwave.  Add to the oils.  Using an immersion blender, blend until combined.  Stir in your essential oils and Optiphen.  Pour into your container.
  3. Apply to wet hair after shampooing.  Massage in and let it sit for 5 minutes (more if you want, I guess.  I’ve never tried longer than 10 minutes.)  Rinse out thoroughly using cool water.  Style as usual.  Try this recipe for shea mango hair butter for your styling product.  Makes your hair shiny and soft!

Shampoo

  • 68 grams castile soap (any scent you like!)
  • 45 grams shea butter
  • 45 grams coconut oil
  • 57 grams distilled water or aloe vera juice
  • 11 grams conditioning emulsifier (optional!)
  1. Melt the shea butter, coconut oil and emulsifier together in the same way as above.
  2. Heat up the water or aloe for about 30 seconds in the microwave.  Add to oils.  Gently pour in the soap.  Using an immersion blender, blend until combined.  Pour into your container.
  3. Apply to wet scalp.  Massage using the pads of your fingers, not your nails.  Rinse out thoroughly.  Condition if you have time but if not, you’ll be okay!

Note: BTMS stands for behentrimonium methosulfate.  I know sulfates are “bad” but that’s not 100% true.  It’s the soapy sulfates you really want to avoid like sodium lauryl sulfate, sodium laureth sulfate, ammonium sulfates.  BTMS also contains cetyl alcohol and cetearyl alcohol, which are about the only 2 alcohols I will use on my hair since they’re fatty alcohols and quite moisturizing.  Lastly, I use BTMS-50, not BTMS-25 but if you do decide to use BTMS-25, I recommend adding cetyl alcohol to the recipe.  I never use BTMS at a percentage higher than 10%.

Check me out on Pinterest!  I pin good stuff, I promise.

3 Ingredient Body Butter Recipe

I love a luxurious, silky body butter.  Usually, I’m big on including water in my recipes because emulsions really contribute to the decadent feeling you get from a cream.  We’re having a brutal winter here in the Northeast so we are requiring much thicker, denser moisturizers.  I tried lotion bars and they were very easy to make, worked really well on my kids but my husband and I don’t find them to be easy or convenient to apply to ourselves.  I might continue to make lotion bars for my girls but make this butter for the grownups.

This butter should be used right after a shower or bath while skin is still damp for best results, although I use it on dry skin too and it’s still great.  I also like to use it as a cuticle butter/hand cream.  As usual, the question is: Does it work on Sasha’s skin?  The answer is yes! If it passes the Sasha test, it’s a definitely keeper and it will go down in my big book of recipes.

Enough chat, here are the percentages:

  • 10% wax
  • 40% liquid oil
  • 50% solid oil/butter

This is the basic recipe. I know I said this is a 3 ingredient recipe in the title. You could easily do this with 3 ingredients. For example: beeswax, jojoba oil, shea butter would be lovely. I, of course, can’t keep things so simple because I’m crazy.  The recipe I used to make 16 ounces is below.

PhotoGrid_1393084560262 (1)

We already used some 🙂

  • 45 grams beeswax
  • 60 grams apricot kernel oil
  • 15 grams castor oil
  • 40 grams avocado oil
  • 40 grams jojoba oil
  • 27 grams sweet almond oil
  • 150 grams shea butter
  • 77 grams mango butter

I melted everything together in a double boiler, stirring constantly.  Then I poured it into my containers and put them in the freezer until they set.  I put them in the freezer to ensure that they cool as quickly as possible, reducing crystallization which cuts down on the grainy feeling that can sometimes be a problem with shea butter and mango butter recipes.  Don’t forget to take them out before they get too cold though!

Okay so that’s 8 ingredients, which is 5 more than 3.  I struggle to keep it simple with my recipes.   But you could follow the percentages above and customize the recipe however you please.

Some nice essential oils would be great to add too.  Be sure to do that once you’ve melted everything already and have removed the mixture from the heat.

PhotoGrid_1393084497745

Do you follow my Soap & Lotion board on Pinterest?  Check it out for some great easy ideas.

All-Natural Regimen for Normal and Dry Skin

I hope everyone had a safe and festive New Year!

This is the second part of a series about all-natural skin regimens.  Read the first one for oily skin here.

My skin is naturally pretty dry.  I struggle to retain moisture, especially in the winter.  In the summer, my skin is usually in heaven but as soon as the windows start to close and the heat starts to come up through the radiators, I become a scaly crocodile.  So, I would say my skin is normal when the climate is right but dry when it becomes too cold.

Acne isn’t too much of an issue for me anymore but when I’m hormonal, pimples can pop up.  I haven’t seen a pimple in about 3 months (knock on wood!) which is about the time I switched to the awesome, carefully crafted through trial and error routine I have now.  So let’s get to it!

Morning

First, I cleanse with some raw honey.  I’m sure I don’t need to reiterate how splendid that stuff is.

After cleansing, I apply a few drops of an oil blend.  It’s homemade, of course.  [Side note: my husband started using this and he loves it.  I have him using all my stuff.  He’s even converted to my homemade deodorant and he doesn’t stink!]  I don’t have an exact recipe for the oil blend but it’s roughly equal parts of the following oils:

  • jojoba oil — highly moisturizing, kind of pricy.  It’s very similar to your skin’s natural sebum (oil) and so skin just drinks it up!
  • fractionated coconut oil — absorbs very easily, good for all skin types even sensitive skin, no  greasy feeling.  This is a “fraction” of coconut oil, meaning some components of coconut oil have been removed.  Even though it doesn’t have the nourishing qualities of coconut oil, it’s great for imparting a silky feeling to the blend and helping it absorb more quickly.
  • camellia oil — very emollient and nourishing.  It also absorbs very easily and deeply, just like the previous two oils.  It improves skin elasticity and diminishes the appearance of fine lines and wrinkles.
  • castor oil — adds body to the blend, has anti-inflammatory and anti-bacterial properties.  I swear it also helps thicken my nonexistent eyebrows. It doesn’t absorb into skin easily so it creates a good barrier to lock moisture in.
  • apricot kernel oil — very nourishing, high in vitamins E and A.  The highly nourishing nature of this oil is great to slow down the aging process, tone the skin, and prevent clogged pores.
  • sweet almond oil — silky and doesn’t clog pores.  Ideal for dry skin and reducing the appearance of blemishes and dark circles.  It’s high in vitamins A, E, and several B vitamins.
  • olive oil — doesn’t absorb that easily but feels light.  It’s chockfull of vitamins and it smooths skin.  In the summer, I prefer to use avocado oil in place of olive oil, especially because it offers some sun protection (not much).

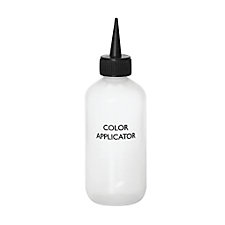
I also add about 30 drops of rosehip seed oil and about 15 drops of lavender essential oil.  Notice the absence of coconut oil?  I only add coconut oil in the summer sometimes.  Coconut oil in the winter dries me out more…not really sure why.  I keep the oil blend in one of these handy dandy containers.

appplicator bottle

After the oil blend, I spray a little hydrating mist.  I have a great recipe for a MAC Fix+ dupe here but that’s really if you’re a die-hard Fix+ girl.  The recipe I use normally is super simple.  I keep it in a one-ounce spray bottle since it’s water-based and has no preservative.  It’s only good for 2 weeks maximum.  Mine is always done before that.

  • 1 teaspoon glycerin
  • 2 tablespoons rosewater
  • 1/2 teaspoon vitamin E oil
  • aloe vera juice until the bottle is full

Shake very well before each use.  Spray at about an arm’s length.

Here’s how my skin looks right after cleanse, oil blend, hydrating mist.

PhotoGrid_1388457485578

Is it weird that I didn’t really notice those little freckles until I saw this pic?

Shiny as hell, right?  That’s how I like it!  No, I’m kidding. It looks much less shiny after it’s absorbed for a few minutes.  My skin tone has become much more even.  I never wear foundation anymore, not even to go out.  The most I’ll do is dust on some mineral powder.

I think I will include vitamin C in my routine very soon as soon as I find a source of vitamin C that I like.  It’s supposed to be very good for skin, especially helping skin look youthful.  I may start using a toner so stay tuned for that recipe.

Night

When it’s time for bed, I cleanse with my cleansing cream.  It contains castile soap, shea butter, mango butter, rosewater, witch hazel, coconut oil, and of course, raw honey.  I sell this lovely cream at my Etsy shop and I also use it to bathe my daughters and myself.  It is truly wonderful.  I’m quite proud of it.

Next, I use a few drops of my oil blend, paying special attention to the areas around my eyes and some hydrating mist if I’m feeling very dry.  That’s it for night time.

Once a Week (or so)

Sometimes I like to do masks or scrubs.  I used to do clay masks but I think they’re better for oily skin or problem skin.  If I’m breaking out, I’ll do a rhassoul clay/tea tree oil mask that works wonders.  I don’t break out often anymore though so I don’t do many masks.  I do a scrub once a week or so:

  • 2 Tbsp of my cleansing cream
  • 1 tsp coffee grounds
  • 2 tsp coffee, room temperature
  • 2 Tbsp organic brown sugar
  • 1 Tbsp raw honey

I LOVE THIS SCRUB.  I can’t say enough good things about it.  It is not very drying or harsh like a lot of other scrubs but my skin is always extra fresh and soft after.  The coffee gives my skin life!  I don’t like salt in my scrubs but you could probably do 1 Tbsp sugar and 1 Tbsp salt if you like salt scrubs.  My only complaint with this scrub is that the coffee grounds are a bit messy.  I’ve tried it without the grounds, though, and it’s just not the same.

Oil Cleansing

Another thing I do every now and then is a “deep cleaning.”  Basically, I just do an oil cleanse.  First, I wet a washcloth with hot water, wring it out, and place it over my face until it gets to room temperature.  I do this to open up my pores.  Then, I massage castor oil + apricot kernel oil into my skin, wet the washcloth with hot water again, place it over my face and sit for about 2 minutes.  Then I wet the washcloth one more time and wipe the oil off my face.  I don’t do this too often because it’s kind of drying…sounds strange right?  Read more about oil cleansing at this awesome site.  She has some good tips, although I don’t do everything she says.

So that’s about it! I hope this post isn’t terribly confusing and boring but you can always comment or shoot me an email over at hippiebrowngirl@gmail.com

RoseMazie Natural Etsy Shop is open!

Hey everyone!

I’ve been out of commission for a little while.  I’m just getting back into the swing of things.  Let’s talk about what’s been happening.

On November 22, my kind and beautiful niece, Kelsey, passed away.  She suffered from Crohn’s disease but we’re not sure if that’s what caused her death.  We’re still waiting to hear about a cause.  She was 24 years old and more like my little sister than niece.  It was sudden, shocking, and devastating.  She had a business where she sold these adorable dolls she made.  Here’s a picture

Image

These were featured at gallery night in a store in Ithaca, NY called Bloom. Click on it to check out her site

Aren’t they so gorgeous?  My daughters are lucky to have their very own K.Chanei dolls.  I’m still so incredibly sad but I know that Kelsey would not want me to put everything on hold forever.  She had an entrepreneurial streak and a creative soul and so, in order to keep her spirit alive, I am going to push myself to be more creative and kinder.  That’s what she would want.

So with that, the RoseMazie Natural Etsy shop is currently open for business.  Right now, we’re offering 2 products – Winter Body Cream in a variety of scents and Peppermint Eucalyptus foot cream.

PhotoGrid_1387118380839

Click on the picture to go to the shop!

For the first release, the creams are packaged in these lovely quilted Mason jars with gold caps.  I hope you’ll take a look and reuse these super cute jars when your cream is done.

Lastly, remember to tell your loved ones how much they mean to you this holiday season.  Never take people you love for granted.  I have many regrets about my time with my niece but I’m trying to stay focused on all the happy times we had together, which were many.  I’m so happy that the last conversation I had with Kelsey was about how much we missed each other and couldn’t wait to see each other at Christmas.  She will remain in our hearts and we are all better because we knew her and loved her immensely.  Please keep my family in your prayers.

Make Your Own Lotion: Preservatives

I’m back with another informative lotion making post!  But first, let me answer some questions from my email (so excited that people, however few, are emailing me with questions!)

What do you know about soap making?

A lot actually! I probably won’t do any posts about it in the near future because I think it’s more intimidating and complex than making lotion. But if you’re interested, I can post my favorite original soap recipe.  I’ll get on it!

Do you have a recipe that works well for eczema?

Yup.  My eldest daughter has mild eczema (used to be moderate but has gotten better) and we use a great beeswax based cream.  I will post in my next lotion post.

Why do you use Optiphen as preservative over other options?

I will discuss that in this post!

I am SO happy that these posts about lotion making are helpful.  Please don’t hesitate to email me with questions at hippiebrowngirl@gmail.com  Onto the matter of preservatives!

Firstly, you are not obligated to use preservative in your homemade lotion for personal use.  The final product will still qualify as a lotion even if you don’t use preservative.  If you would like to start selling lotion, you may be required to use preservative.  I will not discuss much about how to go about selling your homemade lotions since that’s mostly legal stuff.

Although you are not obligated to use chemical preservative, I highly recommend it if you want your lotion to last a reasonable amount of time.  So first, let’s discuss exactly what a preservative is.

A preservative is a chemical that slows the growth of microbes a.k.a. germs and molds.  It does not kill the microbes that are already present so you should make lotions under very sanitary conditions and be sure to sanitize the bottles and caps using 70% isopropyl (rubbing) alcohol.  [This process is easy.  Just pour a small amount of alcohol in the bottle, add the cap, shake it up so the alcohol touches every surface.  Let the bottle air dry, upside down on a bottle tree is best.  When the bottle no longer smells like alcohol, you’re good!]  Preservative is often confused with antioxidant.  The two are not even a little similar though.  Antioxidants prevent oils and butters from decomposing, which would occur with or without microbes.  The process of microbe growth is independent of the process of fats going rancid.  So if a recipe says that vitamin E or any other antioxidant is a sufficient preservative, it should not be used.

I’ve seen many recipes say they use a natural preservative.  The most common natural preservative I’ve seen is grapefruit seed extract.  It is anti-microbial.  However, I have seen conflicting reports.  Some people say that in order for it to have any preservative qualities, the concentration would have to be so high, it would irritate the skin.  I have also seen people say you can use it at the same concentration you would use chemical preservative.  I’ve never experimented.  I can’t say for sure whether it works but I am always wary when reports are so disparate.

I have chosen not to go the natural preservative route.  There are a few reasons why I chose this route despite my hippie ways.

  1. I once made a cream with no preservative and watched it grow moldy before my eyes.  Gross.
  2. Lotion without preservative should be kept in the refrigerator.  I hate keeping lotion in the fridge.  It’s so far from where we use it, it’s extremely inconvenient.  And even in the fridge, it’s only going to last 10-14 days before it gets funky.
  3. Chemical preservatives work fine at a 1% concentration.  That means 99% of my lotion is natural, high-quality ingredients.  That automatically puts my lotion ahead of anything I could buy, in my opinion.
  4. I have full control over what goes on our skin.  I actively avoid parabens and so I can make lotions that use other preservatives that aren’t AS bad.

There are accessible, easy to find preservatives that you can buy online.  The 3 most common ones I have seen are Germaben, Germall, and Optiphen.  I do not use Germaben under any circumstances since it’s a paraben.  You can decide for yourself if you’d like to avoid parabens.  The evidence that parabens are harmful is by no means overwhelming, but it’s compelling enough for me to avoid.  If you’re interested, check this out or just Google it and come to your own conclusion.

Germall is not terrible and I don’t mind it.  I use Optiphen almost exclusively though.  I’ll tell you why.

As far as ickiness goes, I believe Germall and Optiphen are about equal.  [Again, feel free to come to your own conclusions! Always be skeptical and make your own decisions based on evidence.]  They both work at similar concentrations and they’re both effective.  However, most preservatives only work within certain pH ranges and temperature ranges.  Always check to make sure that the preservative you’re using will not be rendered ineffective by pH or temperature!  I use Optiphen because it works at a pretty high temperature meaning I can add it to my lotions while they’re still hot and have not thickened up yet.  Why is that important to me?  That means I can pour my lotions into their bottles while they’re still very easy to pour and then let them cool and thicken in the bottles.  The pH levels are a non-issue for the lotions I make.  I only concern myself with pH when I’m making soaps, scrubs, or hair products since my lotion ingredients mostly fall within a neutral pH range.  [If you’re not 100% sure what pH is, see my post here]

Okay, have I overloaded you?  I’m sorry.  Please email me if you need further clarification at hippiebrowngirl@gmail.com.  If you’re interested in getting your family healthier, using more natural products, taking control of what goes on and in your body, I’m here to help!

Homemade Clay Deep Conditioner for Detangling

This is my go-to when my hair is way dry and desperately needs to be detangled.  One of my major complaints about homemade natural conditioners is that they don’t have enough slip to really help me detangle hair that’s gone too long.  But I have fixed that problem with the addition of a special ingredient!

Let me say, my measurements here are rough estimates.  Sometimes conditions (like humidity, temperature, quality of clay, etc.) can make this conditioner need different proportions of liquid.  You want the end product to have the consistency of a rich, thick, moist paste.

Also this is recipe that is just the right amount for my hair.  I have kind of a lot.  If you have short hair, you should half or third it since it will not keep long.

Ingredients

  • 3/4 cup aloe vera juice (give or take a 1/4 cup, be sure to add slowly to clay)
  • 1/4 cup rosewater
  • 1/4 – 1/2 cup of rhassoul clay (1/2 cup is a lot.  start with a 1/4 cup and add more slowly if it’s watery)
  • 3-4 Tbsp raw honey
  • 3-4 Tbsp coconut oil
  • 2-3 Tbsp marshmallow root powder [this is the special slip ingredient]
  • 20 drops rosehip essential oil
  • 20 drops rosemary essential oil
  • 30 drops lavender essential oil
  • 25 drops ylang ylang oil

Directions

  1. Start with the smallest amount of each of the ingredients.  Mix them in a glass bowl with a utensil that is not metal, like a silicone or rubber spatula.
  2. If it’s too runny, add more clay and honey.
  3. If it’s too thick, add more aloe vera juice.
  4. If it’s not slippery, or feels chalky, add more marshmallow root.
  5. Don’t worry about the coconut oil mixing well because when you rub it between your hands, your body heat will melt the oil.
Looks gross right? Works amazing!

Looks gross right? Works amazing!

Apply generously (easiest to do if hair is separated into medium sections). Twist hair and clip up.  Put on a plastic cap and let sit for at least 20 minutes.  Rinse very thoroughly.

Let me know if you try it!